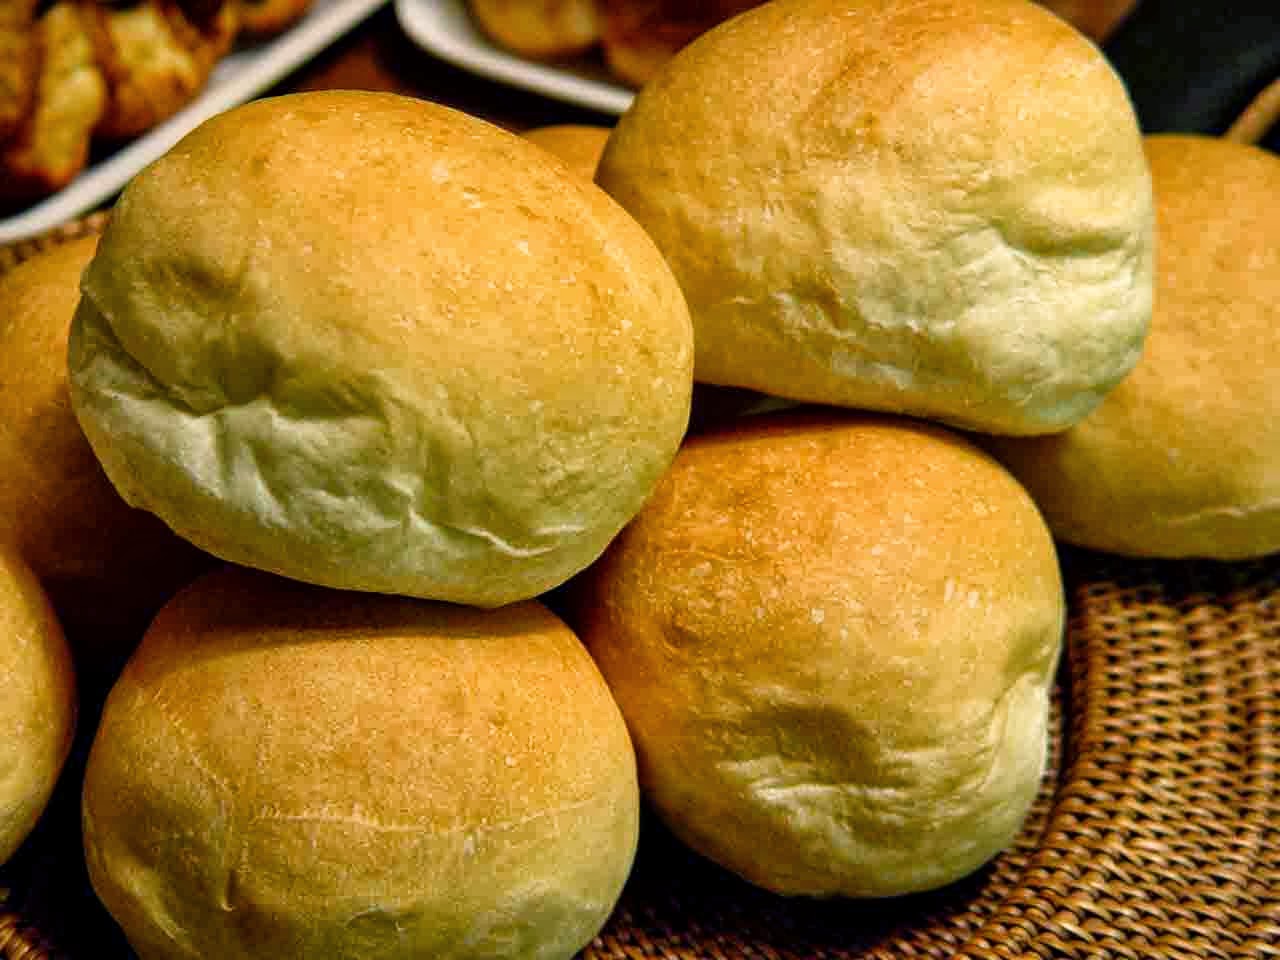
Cotton Bread #BreadWorld
Ingredients:
3 large eggs, separated
1/4 teaspoon cream of tartar
2 ounces cream cheese, very soft
1 tablespoon white sugar
Procedures:
(1) Preheat oven to 350 degrees F (175 degrees C). Line a baking sheet with parchment paper.
(2) Beat egg whites and cream of tartar together in a bowl until stiff peaks form.
(3) Mix egg yolks, cream cheese, and sugar together in a separate bowl using a wooden spoon and then mixing with a hand-held egg beater until mixture is very smooth and has no visible cream cheese. Gently fold egg whites into cream cheese mixture, taking care not to deflate the egg whites.
(4) Carefully scoop mixture onto the prepared baking sheet, forming 5 to 6 "buns".
(5) Bake in the preheated oven until cloud bread is lightly browned, about 30 minutes.
(6) 5 servings
 A shiny, mahogany-brown braid is heavily coated with sesame seeds, giving it nutty flavor and a lovely appearance. Serve it with your pasta, or slice it for sandwiches.
STARTER:
1 cup Unbleached All-Purpose Flour
1/3 to 1/2 cup cool water, enough to make a stiff ball of dough
pinch of instant yeast
DOUGH:
all of the starter
2 cups Unbleached All-Purpose Flour
1 1/4 teaspoons salt
2 tablespoons Baker's Special dry milk or nonfat dry milk
2 teaspoons instant yeast
2/3 cup lukewarm water
2 tablespoons olive oil
TOPPING:
1 large egg white beaten with 1 tablespoon cold water
1/2 cup sesame seeds
Procedures:
To make the starter: Mix the starter ingredients together, cover, and let rest at room temperature overnight. Note: This is a dry, stiff starter. If it's too dry to come together, it may be that you measure your flour differently than we do here at King Arthur, or that you're in a particularly dry climate. Dribble in sufficient water to make the dough come together, and proceed with the recipe as directed.
To make the dough: Combine the starter with the remaining dough ingredients, and mix and knead — by hand, mixer, or bread machine set on the dough cycle — to make a soft, smooth dough.
Place the dough in a lightly greased bowl or large (8-cup) measure; cover, and let it rise for about 90 minutes, till it's just about doubled in bulk.
To make one large loaf: Gently deflate the dough, and divide it into three equal pieces. Shape each piece into a rough log, and let the logs rest, uncovered, for about 10 minutes. This gives the gluten in the dough a chance to relax, which in turn will make the logs easier to roll.
Working on a lightly greased surface, roll each log into a rope about 24" long. Brush each rope with the egg white/water, and sprinkle heavily with the sesame seeds, rolling the ropes gently in the seeds to pick up as many as possible.
Grab one end of each rope, and squeeze the ends together firmly. Braid the ropes, tucking the ends under to make a neat braided loaf.
To make rolls: Follow the directions above, but divide the dough into six pieces, rather than three. Roll each piece into a thin rope about 28" long. Take three of the ropes, and coat with seeds and braid as directed above. Repeat with the remaining three ropes. The resulting loaves will be about 18" long.
Cut each braid into six 3" rolls. Squeeze the cut ends together to seal, and tuck them under.
Place the loaf on a large, parchment-lined (or lightly greased) baking sheet. Or space the rolls on a baking sheet. Cover the loaf or rolls with lightly greased plastic wrap, and allow to rise till very puffy, about 90 minutes. Towards the end of the rising time, preheat the oven to 425°F.
Bake the loaf for about 25 to 35 minutes, till it's a deep golden brown. The rolls will need to bake for about 25 minutes. Remove from the oven, and cool on a rack.
Yield: one large loaf, or 12 rolls.
This is an easy traditional flour tortillas that you can make at home. Explore the versatility of tortillas in so many different ways, serving your family and guests.
 How to Make Homemade Tortillas #BreadWorld
Ingredients:
4 cups all-purpose flour
1 teaspoon salt
2 teaspoons baking powder
2 tablespoons lard (do not use liquid oil)
1 1/2 cups water
Procedures:
(1) Whisk the flour, salt, and baking powder together in a mixing bowl.
(2) Mix in the lard with your fingers until the flour resembles cornmeal.
(3) Add the water and mix until the dough comes together; place on a lightly floured surface and knead a few minutes until smooth and elastic.
(4) Divide the dough into 24 equal pieces and roll each piece into a ball.
(5) Preheat a large skillet over medium-high heat. Use a well-floured rolling pin to roll a dough ball into a thin, round tortilla.
(6) Place into the hot skillet, and cook until bubbly and golden; flip and continue cooking until golden on the other side. Place the cooked tortilla in a tortilla warmer; continue rolling and cooking the remaining dough.
(7) 24 servings
 Cheezy Garlic Breadsticks #BreadWorld
Ingredients:
2 baguettes
2 garlic cloves, crushed
150ml/5 fl oz olive oil
Cheese
Procedures:
• Preheat the oven to 200°C/400°F/Gas mark 6. Cut the baguettes into
three lengthways, then halve each segment, creating 12 breadsticks.
Place the sticks on a baking tray.
• Mix the garlic and oil in a small bowl, then spread over the breadsticks
using a pastry brush. Bake for 15–20 minutes until golden brown. Serve
either hot or at room temperature. Serves 4
 Hot Pan de Sal with Corned Beef Filling #BreadWorld
A versatile way to make pan de sal with corned beef filling, but you can put your choice of fillings like cheese, pork asado, etc.
Ingredients :
For the pan de sal dough :
6 cup of all-purpose flour
2 tbsps. of active dry yeast
1 cup of warm water
1 cup of fresh milk, scalded
1 cup of white sugar
a pinch of salt
1/2 cup of cooking oil
additional flour for dusting
a tablespoonful of oil to coat the bowl
3/4 cup of sweet bread crumbs
1/4 cup of seasoned bread crumbs (the kind used for fried chicken)
For the corned beef filling :
1 tbsp. of finely chopped garlic
1 large onion, finely chopped
1-1/2 cup of canned corned beef
salt and pepper to taste
1 tbsp. of cooking oil
Procedures :
(1) Pour the warm water and scalded milk into a large glass bowl. Sprinkle the yeast over the water. Let stand until bubbly, about 5-10 minutes. Add the salt, the rest of the sugar, oil and half the flour. Mix with a wooden spoon until blended. The dough at this point will be sticky. Add the rest of the flour and continue mixing until the dough forms into a ball and leaves the sides of the bowl.
(2) Transfer the dough to a floured surface (a large wooden board is best). Knead the dough with your hands by folding it then pushing it with the base of your palm. Knead for 10 to 15 minutes or until the dough is elastic and just a bit sticky. Dust with more flour as you knead if necessary.
(3) Lightly oil the sides and bottom of a large glass bowl. Gather the dough into a ball and place it in the bowl, rolling it few times to coat the entire surface with oil. Cover with a damp cloth and leave to rise for an hour. The dough will double in size.
Meanwhile, prepare the filling. Heat the cooking oil in a skillet. Saute the garlic and onion until fragrant. Add the corned beef. Season with salt and pepper. Cook for 3-4 minutes or until the mixture is quite dry. Transfer the sauteed corned beef to a sieve, with a bowl underneath, to drain well.
(4) Stir together the bread crumbs.
(5) Punch down the dough and transfer to the floured wooden board. Knead for a few minutes. Divide into four portions. Roll each portion into a log. Divide each log into 4-5 pieces. Take one piece and flatten with the palm of your hands. Place a teaspoon of the sauteed corned beef at the center of the dough. Gather the edges and pinch to seal well. Roll in the bread crumbs. Repeat until all the dough has been similarly filled. Arrange the uncooked corned beef pan de sal on a baking tray. Leave to rise for another 20 minutes. Bake in a 375oF oven for 20-30 minutes or until the tops turn light brown.
 Sweet Bun Dough #BreadWorld
An easy way to make bread in a different flavor but with such careful preparation. You can add chunky fruit as filling, if you like.
Ingredients:
1/2 cup white sugar
1 cup warm milk (110 degrees F/45 degrees C)
1 tablespoon active dry yeast
4 cups bread flour
2 eggs, beaten (divided)
6 tablespoons vegetable oil
2 teaspoons salt
2 teaspoons water
1 teaspoon sesame seeds for garnish (divided) (optional)
Procedures:
1. Whisk the sugar and milk together in a large mixing bowl until the sugar is dissolved. Stir in the yeast, and let stand until a frothy layer forms on the milk, about 10 minutes. Stir in the flour, most of the beaten eggs (reserve about 1 tablespoon of egg in a small bowl for later), vegetable oil, and salt, mixing well until thoroughly combined.
2. Turn the dough out onto a well-floured work surface, and knead until smooth and elastic, about 10 minutes. The dough should be slightly sticky. Place the dough into a large oiled bowl, cover with a damp cloth or plastic wrap, place the bowl in a warm spot, and let rise until doubled, 2 to 3 hours.
3. Line a baking sheet with parchment paper.
4. Remove the dough from the bowl, and knead it briefly to punch down, about 1 minute. Roll the dough out into a rope, and cut it into 12 equal-sized pieces. Roll each piece into a ball, and use your fingers to flatten each ball into a disc about 5 to 6 inches in diameter.
5. Place about 2 tablespoons of your favorite bun filling in the center of the dough circle, and bring the edges of the dough up over the filling. Pinch and twist the top together to seal in the filling. Make sure there are no open spots. Place each filled bun seam-side down on the parchment paper while you finish making the rest of the buns. Cover the filled buns with plastic wrap, and let them rise for 30 minutes.
6. Preheat oven to 350 degrees F (175 degrees C).
7. Beat the 1 tablespoon of reserved beaten egg with the water to make an egg wash, and brush the top of each bun with the egg mixture. Sprinkle each bun with a few sesame seeds, and bake in the preheated oven until the tops are browned and shiny, turning the baking sheet around halfway through baking, for 20 to 30 minutes. Serve warm.
8. Makes 12 buns
 Cheesy Chorizo Bread #BreadWorld
Ingredients:
1/2 cup Mexican chorizo sausage, chopped
1/2 cup red bell pepper, chopped
3 green onions, chopped
1¾ cups flour
1 tablespoon sugar
2 teaspoons baking powder
1/2 teaspoon baking soda
1/2 teaspoon salt
1/8 teaspoon chipotle powder
1 egg
3/4 cup buttermilk
1 tablespoon honey
1/4 cup vegetable oil
1 cup shredded Monterey jack cheese
Procedures:
1.) Preheat oven to 400ºF. Spray 9x5-inch loaf pan with nonstick baking spray and set aside. In a heavy skillet, cook the chorizo with red bell pepper until chorizo is cooked through, stirring to break up sausage. Drain well, remove from heat, stir in green onions, and cool.
2.) In a large bowl, combine the flour, sugar, baking powder and soda, salt and chipotle powder and stir to combine. In a small bowl, combine egg, buttermilk, honey and vegetable oil and beat until well combined. Add cheese along with chorizo mixture and stir gently.
3.) Pour batter into prepared pan and bake at 400ºF for 30 to 40 minutes until bread is deep golden brown and bread pulls away from sides of pan. Remove from pan and cool slightly on wire rack. Cut into thick slices and serve warm.
4.) Variations for a lowfat version; you can use vegetarian mexican chorizo and lowfat cheese. You can use the vegetarian chorizo too, it has the same flavors ... and is delicious!
 Easy and Popular Bread Making #BreadWorld
Ingredients:
3 cups all-purpose or bread flour, more for dusting
¼ teaspoon instant yeast
1 ¼ teaspoons salt
Cornmeal or wheat bran as needed
Procedures:
(1) In a large bowl combine flour, yeast and salt. Add 1 5/8 cups water, and stir until blended; dough will be shaggy and sticky. Cover bowl with plastic wrap. Let dough rest at least 12 hours, preferably about 18, at warm room temperature, about 70 degrees.
(2) Dough is ready when its surface is dotted with bubbles. Lightly flour a work surface and place dough on it; sprinkle it with a little more flour and fold it over on itself once or twice. Cover loosely with plastic wrap and let rest about 15 minutes.
(3) Using just enough flour to keep dough from sticking to work surface or to your fingers, gently and quickly shape dough into a ball. Generously coat a cotton towel (not terry cloth) with flour, wheat bran or cornmeal; put dough seam side down on towel and dust with more flour, bran or cornmeal. Cover with another cotton towel and let rise for about 2 hours. When it is ready, dough will be more than double in size and will not readily spring back when poked with a finger.
(4) At least a half-hour before dough is ready, heat oven to 450 degrees. Put a 6- to 8-quart heavy covered pot (cast iron, enamel, Pyrex or ceramic) in oven as it heats. When dough is ready, carefully remove pot from oven. Slide your hand under towel and turn dough over into pot, seam side up; it may look like a mess, but that is O.K. Shake pan once or twice if dough is unevenly distributed; it will straighten out as it bakes. Cover with lid and bake 30 minutes, then remove lid and bake another 15 to 30 minutes, until loaf is beautifully browned. Cool on a rack.
(5) Yield: One 1 1/2-pound loaf
 How To Make Cheese Bread #BreadWorld
Cheese bread or cassava bread, are yummy melt in your mouth warm breads made with cheese and cassava starch. You can put some meat fillings and fried for crunchiness.
Ingredients:
2 ½ cups cassava or tapioca starch
4 cups grated mozzarella cheese
1 tsp baking powder
Pinch of salt
1 stick of butter, room temperature, cut into 8 pieces
2 large eggs
Optional 1-2 tbs water, if needed
Procedures:
(1) Combine the yuca starch or flour, cheese, baking powder and salt in a food processor, blend to mix well. Add the butter and eggs.
(2) Mix until small dough balls begin to form, if it's too dry add 1-2 tbs of water.
(3) Remove the dough from the food processor and roll into a ball, you can make the dough ahead and store in the refrigerator for up to a day.
(4) To make the dough by hand, combine all the ingredients in large bowl, using melted (cooled down) butter, and mix until you have a smooth dough. It's actually very easy to prepare by hand.
(5) Pre-heat the oven to 500 F.
(6) Make small round shaped breads with the dough and place on a cookie sheet with parchment paper.
(7) Bake immediately or store in the fridge until ready to bake. I find that they turn out best if you do let them chill in the fridge for about 30 minutes before baking.
(8) Once the oven reaches 500F, turn on broiler, place the breads on the middle rack and bake until the breads are golden, about 5-7 minutes. Another option is to pre-heat the oven to 400F and bake at 400F for about 5 minutes and then turn on the broiler.
(9) Serve immediately, can be served alone or with any sauce of your choice. Yield 20 - 25
(10) Optional: Can be stuffed with meat fillings and fried.
 Mexican-Style Bread Rolls #BreadWorld
A couple different shapes you can make for this bolillo recipe are round or a longer bread, birote style. Yield 6 large rolls. This recipe is perfect for making Mexican tortas or for that big bowl of menudo.
Ingredients:
4 cups of flour, plus more for dusting
1 package active dry yeast
1 tablespoon sugar
1 teaspoon salt
1½ cups warm water
1 egg white
1 tablespoon water or milk
Procedures:
1. In a large bowl combine 1½ cups of flour, yeast, sugar, and salt. Add warm water. Beat with an electric mixer on low to medium speed 30 seconds, scraping sides of bowl. Beat on high speed for 3 minutes. Using a wooden spoon, stir in as much of the flour as you can.
2. Turn out dough onto a lightly floured surface. Knead in enough flour to make a stiff dough that is smooth and elastic (6 to 8 minutes). Shape into a ball. Place in a lightly greased bowl, turning once to coat the surface. Cover and let rise, in a warm space, for 1 hour.
3. Punch down after 1 hour. Turn out onto lightly floured surface. Divide the dough into 6 equal parts, shape into oval shapes, pulling and twisting slightly. Transfer to baking sheet lined with parchment paper. Use a sharp knife to make a cut about a ¼-inch deep along the center of each roll. In a small bowl, combine the egg white and water. Brush the tops and sides of the rolls. Cover with wax paper or a clean kitchen towel and let rise for 30 to 45 minutes.
4. Another method. Preheat oven to 375ºF. Place a baking dish on the bottom rack of oven while it is preheating. Right before baking the bread, fill hot baking dish with 1 cup of room-temperature water. This will create steam and also result in a crisp exterior on the bread. Bake the rolls for 15 minutes. Brush again with egg white mixture. Bake for another 10 to 13 minutes or until golden brown. Remove from baking sheet and cool on wire racks. Rolls can be frozen for up to 3 months in a freezer bag.
Tips: To create the longer, birote-style roll, take the dough ball onto a lightly floured surface and using the palm of your hand, press it out to extend. You are looking for a 6-inch circle. Fold it over like a taco and again using the palm of your hand, press to spread out slightly. Fold again towards seam and twist and extend the ends for that signature shape. Brush with egg wash and let rise according to directions.
Baking Without an Oven #BreadWorld
Baking without an oven is not only possible, it's really very simple to do once you know a few details about baking. Baking is a process to cook food usually done in an oven with dry heat. This method can easily be duplicated on a stove top with a little bit of ingenuity.
Tools
Well seasoned cast iron skillet, dutch oven or large pan with a tight fitting lid (a clear glass lid is preferable). Foil or jar lids to keep food off of the bottom of the pan while heating. Stove top, barbecue grill or Coleman type stove, and last but not least, a method to time cooking with.
Directions
While preparing recipe (below) place pan or dutch oven on heating element. Place jar lids or balled up foil in bottom of pan and place lid on pan. Turn heating element on to approximately medium and allow pan to heat up while you're preparing your recipe.
Recipes
All recipes can be easily adapted to this cooking method. It just takes a few minutes and the changes are very minor. Let's start with a cookie recipe. Prepare your cookie recipe in the same manner you would prepare it for regular oven baking. If it happens to be a little bit gooey you may wish to add another cup of flour in order to help prevent any sticking.
Corn bread and biscuit recipes also adapt well as long as they aren't a liquid batter. Simply add more flour until you have a more doughy consistency.
Baking
Once your recipe is prepared and your pan is heated through you are ready to bake your recipe. For cookies, biscuits or corn bread you'll be placing your dough onto well greased foil that is up on jar rings or balled up foil (you may wish to put cookies, biscuits or corn bread on foil before removing lid from pan and then place foil into pan with your recipe already on it to save heat). Make sure to shape your cookies, biscuits or corn bread in uniform sizes and smooth out the tops to keep cooking even.
Once you have your cookies, biscuits or corn bread in your pan place the lid back onto your pan. Now comes the fun part. Turn the heat down to a low to medium low temperature. Because you pre heated your pan the pan is already hot. Placing the lid on the pan allowed the heat to remain in the pan as well as on the lid. By quickly putting your recipe into the pan and replacing the lid you kept most of the heat in. Now you just need to maintain the heat.
If you're making a casserole simply place your recipe into a smaller casserole dish or cake pan that fits inside of your skilled. Replace lid, turn heat down to low to medium and proceed as below except you won't need to remove your casserole from the heat like you do the cookies. Just keep an eye on it and when it seems to be heated through you can remove it from the heat and allow it to sit a few minutes.
Tips
Cast iron holds heat very well so you shouldn't have to do too much to keep your heat going to bake your recipe. If you notice that nothing seems to be cooking you may simply need to turn up the heat for a few minutes until you can feel the heat on your pan again.
Once the bottoms of your cookies, biscuits or cornbread are browned remove the pan from heat (keeping the lid on the pan) and place on a burner that is not turned on. Allow your recipe to continue "baking" in the pan with lid on until desired doneness is achieved. This could be anywhere from ten minutes to around twenty minutes.
This process doesn't really take any longer than baking in a regular oven, you just need to keep a closer eye on your recipe as it bakes.
 Enjoy Delicious Bread and Cakes With the Help of a High Quality Mixer and Bread Making Machine #BreadWorld
Having a bread making machine and a mixer in your house is one of the best ideas for adding to your kitchen. These amazing appliances will not only used to bake different kinds of breads, but also to save you time and money. You can also use these durable machines to make other sweet goods, pasta dough, pizza dough, and even jam.
The right kind of bread maker helps many people to make excellent tasting bread consistently without any extra effort in a limited time frame. When you have a bread maker, bread-making is truly a hands-off operation. It will not only make uniform bread perfectly, but it will also help you experience the feeling of consuming healthy and fresh bread from the comfort of your own home. When shopping for bread making machines or mixers, Kitchen Specialties and Granary should be your first visit. They offer a number of high quality kitchen appliances that you won't be able to find elsewhere at the same prices.
Bread making machines come with so many advanced features that basically let you toss in your ingredients and enjoy a hassle-free baking process. You can also purchase a large collection of other products from them that will meet all your baking needs. From durable automatic kitchen mixers to gluten-free products, grain mills, baking supplies and even nuts, you will get each and every one of their products at incredible prices. If you want to find out more about their offerings, or aren't sure exactly what you need, you can even chat with an experienced customer service representative who will help you figure out the best appliances for you.
If you love to bake different goodies in your kitchen, then consider a high quality and user-friendly Bosch kitchen mixer. This appliance is the perfect option for those who want to enjoy an efficient and more pleasant cooking experience with one simple change. All of their products are carefully inspected before being shipped, so you don't have to worry about problems when you order from them. They also guarantee their products and ship via UPS so your order will arrive quickly and safely.
Buy the best Bosch food processor from the world's most trusted online store. This durable mixer is efficiently they offer it at an incredible price. For more information about their products and services related to food processor and mixer, visit their website today at http://www.kitchenmixers.com.
 Basic White Bread Variations #BreadWorld
Cinnamon Bread:
Prepare dough, divide and roll out each half into a rectangle, as for Basic White Bread. Mix together ½ cup sugar, and 2 teaspoons cinnamon in small bowl. Spread each rectangle with 1 tablespoon softened butter or margarine. Sprinkle with half of sugar mixture. Finish rolling and shaping loaves. Place in well-greased 8.5x4.5x2.5-inch loaf pans. Cover. Let rise in warm place, free from draft, about 1 hour, or until doubled in bulk. If desired, brush tops with beaten egg white. Bake at 375F for 40 to 45 minutes, or until golden brown. Remove from pans immediately and cool on wire racks.
Yield 32 servings (16 slices per loaf)
Sixty-Minute Rolls:
Increase yeast to 3 packages and sugar to ¼ cup. Mix and knead dough as directed in Basic White Bread. Place in greased bowl, turning to grease top. Cover. Let rise in warm place, free from draft, about 15 minutes. Turn dough onto lightly floured surface. Shape as desired (curlicues, cloverleafs, etc.). Cover. Let rise in slightly warm oven (90F) about 15 minutes. Bake at 425F for 12 minutes or until golden brown. Remove from pans immediately and cool on wire racks.
a) Curlicues: Divide dough in half and roll each half to 12x9-inch rectangle. Cut 12 equal strips about 1-inch wide. Roll each strip tightly to form a coil, tucking ends underneath. Place on greased baking sheets about 2 inches apart.
b) Cloverleafs: Divide dough into 24 equal pieces. Form each piece into a ball and place in greased muffin pan. With scissors, cut each ball in half, then quarters.
Yield 24 servings (1 roll per serving)
 You Want Chicken, Lamb or Beef Pie? #BreadWorld
This recipe is nothing new to make a pie, just a traditional way to bake, but you can create your own ideas on how to make at home. Empanadas too can be too tricky to make, but it needs practice to perfectly bake in a variety of meats being used. You can also use leftover burger patty meats.
Ingredients:
For Dough:
1/4 cup whole wheat flour
2 cups bread flour
1 teaspoon salt
3/4 cup warm water (about 115 degrees)
1 yeast packet
1 tablespoon lard or butter
For Filling:
12 ounces ground chicken, lamb or beef
6 cloves garlic, chopped
2 tablespoons fresh oregano, chopped
2 tablespoons parsley, chopped
2 tablespoons green onion, chopped
2 teaspoons salt
1 teaspoon black pepper
3 tablespoons lard or butter
1 egg
Procedures:
1.) Mix the flours and the salt together in a large bowl. Mix the yeast and the warm water in a cup and let hydrate for 15 minutes. Meanwhile, mix the lard into the flour with your hands until it looks like a coarse meal.
2.) Pour the hydrated yeast into the flour and mix well. Knead for 5 minutes, cover in plastic wrap and let rest 1 hour.
3.) Meanwhile, mix all the filling ingredients — except for the lard – together in a bowl.
4.) Preheat the oven to 475 degrees.
5.) To make the pies, roll the dough into a rough log and slice off 1/3 of it. Now cut each piece into thirds. Take out one of the pieces from the larger portion of dough and keep the rest covered with a damp cloth.
6.) Roll out the dough into a 6-inch circle about 1/8-inch thick. Use a bowl or large glass to cut a perfect circle. Put some of the filling into the center of the circle, leaving about 1 inch border on all sides. Set that dough onto a baking sheet lined with parchment. Do the same thing with the other 2 larger pieces of dough. When you have all three pies set out, press 1 tablespoon of lard or butter onto the center of the filling of each pie.
7.) To make the tops of the pies, roll out each smaller piece of dough to about the same thickness — they should be smaller, about 5 inches in diameter. Lay the top on the venison filling.
8.) Now take up the bottom of the larger piece of dough and attach it to the top piece of dough by pinching and crimping it over. Do this all around the pie to seal it. With a very sharp knife slice vents in the top of the pie.
9.) Beat the egg with a little water and paint all the pies with it. Bake in the oven for 20-25 minutes, or until they are golden brown. Let the pies rest on a rack for at least 10 minutes before eating. They are good hot, cold or at room temperature.
 Focaccia Fingers #BreadWorld
This has recently become the favorite focaccia recipe for your party.Sliced it to the size that you like.
Ingredients:
4 1/2 Cups All-purpose Flour
2 Teaspoons Instant Rise Yeast
1 1/2 Cups Warm Water (Approximate)
1 Teaspoon Sea Salt
2 Tablespoons Olive Oil
Topping Ingredients:
1 1/2 Cups Chopped Ripe Tomatoes
1/2 Cup Pitted And Chopped Black Olives
3 Cloves Garlic, Peeled And Thinly Sliced
1 Teaspoon Dried Oregano
4 Tablespoons Finely Chopped Fresh Basil
1/3 Cup Extra Virgin Olive Oil
Salt & Pepper
Directions:
(1) Place the flour in a bowl with the salt, yeast and olive oil and stir.
(2)Slowly add enough water to create a dough that sticks together and isn't too wet.
(3)Dump the dough onto a lightly floured surface, and begin to knead the dough with your hands until it is smooth, soft, but no longer sticky.
(4)Place the dough in a lightly oiled bowl, cover with plastic wrap and let sit in a warm spot in your kitchen until it has doubled in size, about an hour and a half.
(5)While the dough is rising, mix together your topping ingredients in a bowl and set aside.
(6)Once the dough has doubled, preheat your oven to 425 degrees F. Lightly oil a 13 X 9 inch baking sheet and dump the dough into the prepared pan. Use your fingers to press the dough evenly into the pan, and create dimples all across the top with your fingers.
(7)Spoon the topping mix evenly across the top of the focaccia and let sit for 15 minutes.
(8)Bake the focaccia for about 25 minutes, or until it is crisp and lightly golden brown on top.
(9)Let cool for 10 minutes and then cut into fingers using a serrated bread knife.
(10) Yield: Makes 1 (13 x 9 Inch) Focaccia
Enjoy the Freshest Breads Everyday #BreadWorld
Say you want the finest gourmet breads imaginable, what do you do? If you're like most people, you'll probably visit your favorite bakery which has spread out ubiquitously. However, if you possess some talent in baking and do have some spare time, you can opt to do your personal baking at home. While each approaches may get what you want, neither gives the impression of practicality. Visiting a specialty bakeshop can be somewhat expensive. Similarly, preparing your own bread, though fulfilling, can be very tedious. Think about all the work and mess you'll create, mixing all the ingredients and doing all the kneading.
But picture this: You wake up to freshly baked breads every morning without setting your foot outside, or exerting much effort. This might seem too good to be true, but its not. Lo and behold, the Breville Automatic Breadmaker.
Bread making machines are a new concept for most of us. But if you are a bread lover, this machine might just become your best companion. The Breville Automatic Breadmaker allows anyone (yes, even those who are clueless about baking) to bake his / her favorite loaf in just three easy steps. How easy it is? Simply pour in all the required ingredients, program the machine as to your desired setting, and wait until the machines baking process is done.
As one of the well-known kitchen brands in the world, Breville shaped its automatic breadmaker with features that will delight any bread enthusiast. Choose from a dozen of baking programs that include Basic, Sweet, Continental, French, and more. Pasta and jam settings are also included, making the machine a more versatile unit. You can even customize your bread loaf by loading your much loved toppings using its fruit and nut dispenser.
Among its variety of cool features, nothing beats the preset timer function which allows you to have your freshly baked bread exactly when you want it. Say its eight in the evening and you plan to get up at 6 a.m. the following day (or 10 hours later). Simply set the timer to 10 hours and the machine will start baking at the appropriate time and your bread will be ready at exactly 6 a.m. for sure. For this reason, you dont have to push yourself to wake up early to prepare and bake; youll be awakening by the comforting aroma of fresh breads instantly.
Being lazy is not really a bad thing. If you're not very eager on preparing the ingredients yourself, Breville Premixes are also available. It comes in four recipes for you to get rid of some other guesswork. Moreover, Breville includes a free Starter Pack, which includes measuring cups and sample premixes to fire up your bread baking enthusiasm.
Breville truly makes the freshest breads a simple reality. It makes all the unimaginable task of everyday home baking into a more convenient one. Just imagine the multitude of delightful breads you could make. Of course with the Breville Breadmaker, you dont have to.
 Importance of Bakery Products In Our Daily Life #BreadWorld
People of all ages are affectionate of different bakery products, because of their taste, color and easy to digest nature. They eat and serve different bakery products in their parties and festivals. Celebrating any moment of happiness is incomplete with bakery products.
Bakery products are becoming prominent day by day. They are very popular because of its taste and simple to digest. Bakery items are usually loved by all. Nowadays individuals have virtually no time to invest much on making breakfast it is the bread and bun or biscuits which had occurred instead of other sorts of stuff. Honoring any time of pleasure is incomplete with bakery items.
They are good supply of snacks and therefore are broadly available. Bread is the staple diet of all. Bread may be the essence of bakery items. Without bread, no bakery items are complete. It is made by baking dough of flour and water. With bread with veggies, butter, fruits and spices or herbs constitutes a perfect mixture of sandwiches. Bread includes whitened and brown bread. Delicious cakes, pastries, pizzas and burgers are a choice of generation next youths. Well, take the example of your morning tea, won't you miss the taste of tea or coffee without crunchy biscuits.
There are numerous varieties of bakery products like, cakes, biscuits, brownies, Conches, Empanadas, Pan de Nuevo, Cakes, pastries, pizzas are the most famous bakery products, and they all were popular worldwide. Bakery products serve the best principle and all products are hygienic made of fruits, flour, nuts, honey, eggs, flour, sugar, flavors for taste, and colors for look.
Cakes are typically the most popular bakery items. Moment one listens to the title of cake or chocolate mouth is stuffed with water. Cake serves the objective of honoring pleasure and happiness. Cakes refer to round, flat, unleavened breads, which were cooked on the hot stone. Which is made from chocolates, vanilla, strawberry, sugar and eggs? Even cake also provide wide selection includes Rim Cream Cheese Coffee Cake, Boston cream cake, Carrot Cake, Chocolate Almond Torte, Chocolate Blueberry Cake, Chocolate Meringue Cake, Coconut Cake, Orange Chiffon Cake. If birthday is incomplete without cakes then snacks without snacks isn't good. Both cakes and snacks complement one another.
One more benefit of bakery products are time saving. By serving bakery products to sudden guests, homemakers save their time and prove their homely skills. It does not require much time in preparing meals if you have ready-made breads or buns at home. Their durability, taste, and eye-catching appeal make the product famous.
Bakery products are used on a daily basis and are liked by all. Whether it is any special occasion or not bakery products due to their sweetness and attractive colors fills the air with sweet aroma of love.
 How to Make Muffin Tops (includes A Muffin Top Recipe) #BreadWorld
The muffin tops are the best part of the muffin. It's the crunchy, light part of the muffin not the part that has sweated in the pan. No wonder everyone loves the tops.
With a muffin top pan, you can make only the tops. A muffin top pan has indented cavities about 3/8-inch deep and 4-inches in diameter. You load these cavities with batter. With a stiff batter, you can make high domed tops and because these are jumbo-sized tops, six will equal a batch of a dozen regular muffins.
Product Testing in Our Test Kitchen
At our test kitchen in Rigby, Idaho, we tested both recipes and mixes in muffin top pans. We used nonstick muffin top pans manufactured by Norpro. We experimented to learn how to use the pans to make the best muffin tops. Here is what we learned along with a recipe that we think you will enjoy.
- Everyone wants high-domed muffins. You can make high domes in a muffin top pan as well as in a standard pan. The techniques are the same. Many muffin recipes call for high heat at the beginning of the baking period to create the rise necessary for attractive domes. You can do the same with a muffin top pan but because the batter is above the pan, it is not as necessary. With stiff batter mounded high in the pan, you will bake high-domed muffin tops.
- Because the batter is not as deep, it takes less time to bake muffin tops. Reduce the baking time by about a third. For most recipes and mixes, baking at 375 degrees for 15 to 16 minutes was about right.
- With a thin batter, less can be put in a muffin top pan. The domes will not be as high and you'll have more muffin tops.
- If you are making high-domed muffin tops they will be larger than muffins. A 12-muffin mix or recipe yields six large, high-domed tops. A flatter muffin top is equal to a standard muffin.
- One of the joys of a muffin top pan is that the muffin tops don't stick as muffins often do. Just let them cool for a couple minutes and lift them off the pan.
Banana Chocolate Chocolate Chip Muffin Tops
This recipe is adapted from our Banana Chocolate Chocolate Chip Muffin recipe and yes, it's a good as it sounds. Again, tops are the way to go.
This is sweet enough; it's almost like a cake. In fact, you can serve it with whipped cream or ice cream and little fudge topping for a special treat.
Ingredients
1 3/4 cups all-purpose flour
1/4 cup cocoa
1/2 teaspoon salt
1/2 tablespoon baking powder
1/2 teaspoon baking soda
2 large eggs
1/4 cup vegetable oil
1/3 brown sugar
2/3 cup sour cream
2 tablespoons milk
1 cup ripe bananas, mashed (about two smaller bananas)
1 teaspoon banana flavor
1/2 cup walnuts, chopped
2/3 cup semisweet chocolate chips
Directions
Preheat the oven to 375 degrees.
1. In a medium bowl, mix the flour, cocoa, salt, baking powder, and baking soda.
2. In another bowl, mash the bananas. Whisk two large eggs and add those to the bananas. Add the oil, milk, flavor, brown sugar, and sour cream. Blend well. Stir in the nuts and chocolate chips.
3. With a spatula, mix the dry ingredients into the liquid mixture. Stir until just combined. Spoon the batter into greased muffin top tins.
4. Bake for 15 minutes. Let the muffins sit in the tins for a few minutes and then remove them to wire racks to cool. Makes 8 to 10 muffin tops.
Crumb Topped Banana Muffins
Ingredients:
1 1/2 cups flour
1 teaspoon baking soda
1 teaspoon baking powder
1/2 teaspoon salt
3 large ripe bananas, mashed
3/4 cup sugar
1 egg, lightly beaten
1/3 cup butter, melted
Topping
1/3 cup packed brown sugar
1 tablespoon flour
1/8 teaspoon cinnamon, to taste
1 tablespoon cold butter
1/4 cup chopped nuts (optional) (I used chopped almonds)
Procedures:
1) In large bowl, mix the dry ingredients.
2) Mix bananas, sugar, egg and butter.
3) Stir into dry mixture just until moistened. Fill muffin cups 3/4 full.
4) Combine first 3 topping ingredients.
5) Cut in butter until crumbly. Sprinkle over muffins.
6) Bake at 375° for about 20 minutes, until muffins test done.
7) Cool in pan for 10 minutes.
 Classic Easter Buns #BreadWorld
A much-loved recipe, Easter buns were traditionally eaten for breakfast on Easter time. They were first made in the 18th century, when they were extra rich and spicy, and marked with a cross as a reminder of the festival.
MAKES 12
15 g (1/2 oz) fresh yeast or 7.5 ml (1 1/2 tsp) dried
300 ml (1/2 pint) warm milk
450 g (1 lb) strong white flour
5 ml (1 tsp) salt
5 ml (1 tsp) ground mixed spice
5 ml (1 tsp) ground cinnamon
2.5 ml (1/2 tsp) grated nutmeg
50 g (2 oz) caster sugar
75 g (3 oz) butter
75 g (3 oz) currants
25 g (1 oz) chopped mixed peel
1 egg, beaten
50 g (2 oz) plain flour
For the glaze
60 ml (4 tbsp) fresh milk and water, mixed
45 ml (3 tbsp) caster sugar
Procedures:
1. Dissolve the fresh yeast in the milk. If using dried yeast, sprinkle it into the milk and leave in a warm place for about 15 minutes, until frothy.
2. Put the strong flour, salt, spices and sugar in a bowl. Rub in 50 g (2 oz) of the butter, then stir in the currants and peel. Make a well in the centre and stir in the egg and yeast liquid and beat together to a soft dough.
3. Turn on to a lightly floured surface and knead for about 10 minutes, until smooth and elastic and no longer sticky. Put into a clean bowl, cover with a clean tea-towel and leave to rise in a warm place for about 1 hour, until doubled in size.
4. Turn the dough out on to a floured surface and knead for 2 - 3 minutes. Divide the dough into
12 pieces and shape into round buns.
5. Place on greased baking sheets, cover and leave in a warm place for about 30 minutes, until doubled in size.
6. Meanwhile, make the pastry for the crosses. Put the plain flour in a bowl and rub in the remaining butter until the mixture resembles fine breadcrumbs. Stir in enough water to bind the mixture together. Knead lightly.
7. Roll out the pastry thinly on a floured surface and cut into thin strips about 9 cm (3 1/2 inches) long. Dampen the pastry strips and lay two on each bun to make a cross.
8. Bake at 190°C (375°F) mark 5 for 15 - 20 minutes, until golden brown. For the glaze, heat the milk and water with the sugar. Brush the hot buns twice with glaze, then transfer to a wire rack to cool.
 The Original Coconut Pie #BreadWorld
Young coconut meat is used with this pie recipe. You can spread caramel sauce over the slice when eating this pie. Better still, with scoops of ice cream.
Ingredients:
Crust:
1 cup unsalted butter
1 & 1/2 cups crushed Grahams Biscuits
1/2 cups oats
3 tbsp sugar
Filling:
1/2 cup coconut water
1/2 cup sugar
1/2 cup evaporated milk
2 cups young coconut meat, cut into strips
1/3 cup cornstarch
Procedures:
1) Prepare crust: Melt butter in pan; add oats, crushed Grahams and sugar. Cook 3 minutes.
2) Press half of mixture evenly in serving dish. Refrigerate 30 minutes.
Prepare filling: Mix coconut water and evaporated milk in bowl.
3) Mix cornstarch and sugar in saucepan.
4) Add coconut meat and cook over medium heat 20 minutes or until mixture thickens.
5) Spread coconut mixture over refrigerated crust. Top with remaining Grahams mixture.
6) Chill before serving. Serve with caramel sauce or ice cream.
Follow Me @lachicafernandoinstagram